原文始发于Tristram:Intro To Honeypots
Honeypots remain a relatively unexplored concept beyond the realms of security research organizations. This is largely due to the stigma where these types of systems are typically observed as being exploitable, therefore introducing unnecessary risk. This fear of the unknown results in lost opportunities for defenders by avoiding the topic altogether.
蜜罐仍然是一个相对未被探索的概念,超出了安全研究组织的领域。这主要是由于这些类型的系统通常被认为是可利用的耻辱感,因此引入了不必要的风险。这种对未知的恐惧导致捍卫者完全回避这个话题而失去了机会。
We will help eliminate this fear by illustrating how the strategic planning of a honeypot can not only leverage anticipated behavior from attackers but also serve as a proactive defensive measure, enabling early threat detection within a controlled environment.
我们将通过说明蜜罐的战略规划如何不仅利用攻击者的预期行为,而且还作为主动防御措施,在受控环境中实现早期威胁检测,从而帮助消除这种恐惧。
Understanding Defensive Honeypots
了解防御性蜜罐
- What is a Honeypot?
什么是蜜罐? - Utilizing Honey Tokens 利用蜂蜜代币
- Managing The Risk 管理风险
- Practicality Through Deception
通过欺骗实现实用性
What is a Honeypot?
什么是蜜罐?
A honeypot is a strategically positioned system that serves a variety of purposes. These purposes range from being a decoy, deliberately exploitable, to a hardened system with extensive monitoring as well as a combination of all three.
蜜罐是一种具有战略意义的系统,具有多种用途。这些目的的范围从诱饵,故意利用,到具有广泛监控以及所有三者的结合的强化系统。
Systems that are built to serve as a decoy are used to pull attackers away from production systems with the hopes that they waste their time and resources long enough to draw a response from defenders.
构建为诱饵而构建的系统用于将攻击者从生产系统中拉开,希望他们浪费时间和资源足够长的时间以引起防御者的响应。
Exploitable systems are usually leveraged by security researchers as well as law enforcement as a means to research behaviors and techniques employed by attackers in the wild. These types of systems are very complex and tend to reside within a honeypot network that hides behind the veil of a shell company that doesn’t actually exist. The intent behind this is to make it more believable without raising too many alarms. Attackers will utilize similar techniques by spinning up websites with a seemingly harmless front end with the hopes that it will get categorized as a low risk site before being used to serve malicious payloads.
安全研究人员和执法部门通常利用可利用的系统作为研究攻击者在野外使用的行为和技术的手段。这些类型的系统非常复杂,往往驻留在蜜罐网络中,该网络隐藏在实际上不存在的空壳公司的面纱后面。这背后的意图是使其更可信,而不会发出太多警报。攻击者将利用类似的技术,用看似无害的前端启动网站,希望它在用于提供恶意负载之前被归类为低风险网站。
Most exploitable systems tend to blend in very well while some are extremely obvious with services such as RDP or SMB exposed to the internet with the intent to draw immediate attention.
大多数可利用的系统往往融合得很好,而有些系统非常明显,RDP或SMB等服务暴露在互联网上,目的是引起立即的注意。
There are also honeypots that exist as public services to collect and analyze various payloads. While some of these services are simply built as a means for professionals (and cyber criminals) to test the detection rate of their payloads, they are equally leveraged as a means to distribute payloads to anti-virus companies and law enforcement looking to get an edge on new techniques used in the field.
还有一些蜜罐作为公共服务存在,用于收集和分析各种有效载荷。虽然其中一些服务只是作为专业人士(和网络犯罪分子)测试其有效载荷检测率的一种手段而构建的,但它们同样被用作向防病毒公司和执法部门分发有效载荷的手段,这些公司和执法部门希望在该领域使用的新技术中获得优势。
Honeypots are not only deployed as a workstation or server, but can also be a type of object planted virtually, referred to as a honey token. These tokens can range from intentionally exposed emails to catch phishing emails as well as objects planted in a directory service with dedicated monitoring as a means to identify instances where an attacker is enumerating Active Directory or performing a kerberoasting attack for example.
蜜罐不仅可以部署为工作站或服务器,还可以是一种虚拟种植的对象,称为蜂蜜令牌。这些令牌的范围可以从故意暴露的电子邮件到捕获网络钓鱼电子邮件,以及植入目录服务中的对象,这些对象具有专用监视,用于识别攻击者枚举 Active Directory 或执行 kerberoasting 攻击的实例。
In this case study we will walk through a strategy where we will be designing a system that isn’t intended to be exploitable but will be used as a honey token of sorts where we’ll monitor for and take advantage of expected behavior.
在本案例研究中,我们将介绍一个策略,在该策略中,我们将设计一个不打算被利用的系统,但将用作各种蜂蜜令牌,我们将在其中监视和利用预期的行为。
Utilizing Honey Tokens 利用蜂蜜代币
The type of system we will be building will utilize the strategic implementation of honey tokens, akin to that of a tripwire, that we will use to key in on targeted behavior. We will use these techniques to highlight distinct phases of an attacker’s interactions with a system. With each phase that is triggered, we will be able to generate useful data during that stage of an attack.
我们将构建的系统类型将利用蜂蜜代币的战略实施,类似于绊线,我们将用它来锁定目标行为。我们将使用这些技术来突出攻击者与系统交互的不同阶段。随着触发的每个阶段,我们将能够在攻击的该阶段生成有用的数据。
The concept of honey tokens can realistically be incorporated into any legitimate production system but depending on the size of your organization then can lead to alert fatigue and easily become very overwhelming with the amount of chatter generated from legitimate use that needs to be filtered through. Where we will be using this on a honeypot, we have already cut the work in half as no legitimate client will be using the system.
蜂蜜代币的概念实际上可以纳入任何合法的生产系统,但根据您的组织规模,可能会导致警报疲劳,并且很容易变得非常压倒性,因为合法使用产生的喋喋不休的数量需要过滤。我们将在蜜罐上使用它的地方,我们已经将工作量减少了一半,因为没有合法客户端会使用该系统。
Managing the Risk 管理风险
The first thing that typically scares people away from using honeypots is that they are afraid it will become compromised and end up causing more problems than it will solve. While we could argue this to be true for any system that is exposed to the internet, we can simply introduce the same amount of due care and attention as we would when spinning up any system that would be exposed to the internet.
通常让人们害怕使用蜜罐的第一件事是,他们担心它会受到损害,最终导致比解决更多的问题。虽然我们可以争辩说,对于任何暴露在互联网上的系统来说,这都是正确的,但我们可以简单地引入与启动任何将暴露在互联网上的系统时相同的适当关注和关注。
The first thing we will need to do is ensure that we have a clear goal in mind so we can start building exactly what we need from start to finish. In this case study, we are going to produce a simple web server that will draw the attention away from our production systems with the lure of a false flag through a deceptive landing page and planting a fake logon portal in a hidden directory exposed through a robots.txt file.
我们需要做的第一件事是确保我们心中有一个明确的目标,这样我们就可以从头到尾开始构建我们需要的东西。在本案例研究中,我们将制作一个简单的 Web 服务器,该服务器将通过欺骗性登录页面的虚假标志的诱惑将注意力从我们的生产系统上移开,并在通过 robots.txt 文件暴露的隐藏目录中植入一个虚假登录门户。
Once you have built your system, you can assess its security by performing your own penetration test, but there would be too much bias associated with the assessment. Instead, put your system to the test by exposing honeypot to a third-party penetration test to identify any unexpected vulnerabilities prior to exposing it to the internet.
构建系统后,您可以通过执行自己的渗透测试来评估其安全性,但评估会产生太多偏差。相反,通过将蜜罐暴露给第三方渗透测试来测试您的系统,以在将其暴露给互联网之前识别任何意外的漏洞。
If you do this, be sure to avoid revealing the inclusion of a honeypot within the assessment scope. If you do, you will forever burn its usefulness due to significant bias that will exist from that point forward from that company. While not incredibly critical, this is a judgment call you need to make to determine what is best for your security program.
如果这样做,请务必避免在评估范围内泄露蜜罐。如果你这样做,你将永远燃烧它的有用性,因为从那时起,该公司将存在重大偏见。虽然不是非常关键,但这是您需要做出的判断,以确定什么最适合您的安全计划。
Practicality Through Deception
通过欺骗实现实用性
One of the benefits of using a web server is that it will not raise immediate suspicion. This is because it’s more than appropriate to assume that an enterprise environment will have one or more web servers available through a demilitarized zone.
使用 Web 服务器的好处之一是它不会立即引起怀疑。这是因为假设企业环境将有一个或多个通过隔离区可用的 Web 服务器是非常合适的。
It will be important to ensure that when you start building out your system that you keep it well crafted and consistent so that it blends in with what your organization currently has available or at a minimum what would be considered expected for your type of organization. For example, spinning up a banking portal when you’re a healthcare system won’t make any sense.
重要的是要确保在开始构建系统时保持精心设计和一致,以便它与您的组织当前可用的内容或至少与您的组织类型所期望的内容融为一体。例如,当您是医疗保健系统时,启动银行门户将没有任何意义。
Keep in mind that we are all still human and humans make mistakes that tend to develop into bad habits which.is especially true with penetration testing. Most people get exposure to this field through capture-the-flag machines and lab environments that do not include security controls. This creates a false sense of security that results in gung-ho testers acting overly aggressive with their scans and attacks which will more often than not result in them falling right into the hands of a blue team.
请记住,我们仍然是人类,人类会犯错误,这些错误往往会发展成坏习惯 which.is 渗透测试尤其如此。大多数人通过捕获标志的机器和不包括安全控制的实验室环境接触到这个领域。这会产生一种虚假的安全感,导致 gung-ho 测试人员在扫描和攻击时表现得过于激进,这通常会导致他们直接落入蓝队手中。
With a better understanding of honeypots and why we are building a web server, we will go through the steps of building out a functional system.
随着对蜜罐的更好理解以及我们为什么要构建Web服务器,我们将完成构建功能系统的步骤。
Building A Web Hive
构建网络配置单元
- Installing Our Web Server
安装我们的网络服务器 - Hardening Apache 强化阿帕奇
- Enumeration Honey Tokens
枚举蜂蜜令牌 - Authentication Honey Tokens
身份验证蜂蜜令牌 - Collecting Honey 收集蜂蜜
We are building this system in a way that will take advantage of two activities that an attacker will usually perform against an available web application, namely enumeration and authentication. While these scenarios may seem basic, we will find that they’ll be able to provide us useful information that could be leveraged as an early detection and mitigation mechanism to identify an existing compromise or help prevent one before it occurs.
我们正在构建此系统,以利用攻击者通常对可用 Web 应用程序执行的两个活动,即枚举和身份验证。虽然这些方案可能看起来很基本,但我们会发现它们能够为我们提供有用的信息,这些信息可以用作早期检测和缓解机制,以识别现有的入侵或在入侵发生之前帮助防止它。
Installing Our Web Server
安装我们的网络服务器
For this system we are going to build an Apache Web Server on top of Ubuntu Server Minimized that we will name ‘support’. It goes without saying that it is important to refrain from ever using the word honeypot anywhere within your server build.
对于这个系统,我们将在Ubuntu Server Minimized之上构建一个ApacheWeb服务器,我们将命名为“支持”。不言而喻,重要的是不要在服务器构建中的任何位置使用蜜罐这个词。
If you happen to be using a personal lab to test, you could take advantage of the version of Apache that is already installed on Kali Linux. This way you can build and test your system locally prior to porting it over to a more permanent location.
如果您碰巧使用个人实验室进行测试,则可以利用Kali Linux上已安装的Apache版本。这样,您可以在将系统移植到更永久的位置之前在本地构建和测试系统。
We will start off by making sure that /etc/apt/sources.list is populated and then we’ll upgrade our system using the apt tool.
我们将首先确保填充 /etc/apt/sources.list 它,然后我们将使用 apt 该工具升级我们的系统。
lab@support:~$ sudo apt update
lab@support:~$ sudo apt full-upgrade -y
Listing – Installing updates on our system
列表 – 在我们的系统上安装更新
Since Apache does not come pre-installed on Ubuntu Server we’ll go ahead and install the apache2 package.
由于 Apache 没有预装在 Ubuntu 服务器上,我们将继续安装 apache2 软件包。
lab@support:~$ sudo apt install apache2Listing – Installing the Apache2 package
列表 – 安装 Apache2 软件包
Next we will make sure that our service is running by using the service command.
接下来,我们将使用该 service 命令确保我们的服务正在运行。
lab@support:~$ service apache2 status
● apache2.service - The Apache HTTP Server
     Loaded: loaded (/lib/systemd/system/apache2.service; enabled; vendor preset: enabled)
     Active: active (running) since Tue 2023-08-22 15:03:27 UTC; 1min 6s ago
Listing – Checking the apache2 service status
列表 – 检查 apache2 服务状态
Now that we confirmed that the service is up and running we’ll check if we can browse to our web server from our browser.
现在我们确认服务已启动并正在运行,我们将检查是否可以从浏览器浏览到我们的 Web 服务器。
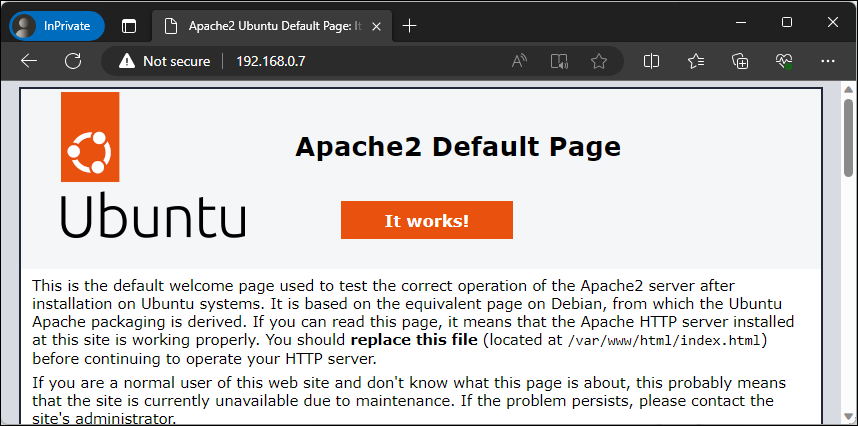
Figure – Browsing to our default page
图 – 浏览到我们的默认页面
Up to this point we have confirmed that we have a functioning web server. Next we need to enable PHP functionality by installing the libapache2-mod-php package. This component is only necessary if you are planning on incorporating PHP, otherwise only install the dependencies that you need.
到目前为止,我们已经确认我们有一个正常运行的Web服务器。接下来,我们需要通过安装 libapache2-mod-php 软件包来启用 PHP 功能。仅当您计划合并 PHP 时才需要此组件,否则仅安装所需的依赖项。
lab@support:~$ sudo apt install libapache2-mod-phpListing – Installing the libapache2-mod-php package
列表 – 安装 libapache2-mod-php 软件包
To confirm that our web server can now properly interpret and execute PHP code, we’ll create a simple PHP web page called test.php that will execute the phpinfo() function. If this works properly then the server will produce a page containing details about the version of PHP and other details about the environment. We will do this by running the echo command followed by sudo tee to create our page.
为了确认我们的 Web 服务器现在可以正确解释和执行 PHP 代码,我们将创建一个名为 PHP 的简单 PHP test.php 网页,该网页将执行该 phpinfo() 函数。如果这工作正常,那么服务器将生成一个页面,其中包含有关 PHP 版本的详细信息以及有关环境的其他详细信息。我们将通过运行 echo 命令来创建 sudo tee 我们的页面来执行此操作。
lab@support:~$ echo '<?php phpinfo(); ?>' | sudo tee /var/www/html/test.phpListing – Creating a PHP test web page
列表 – 创建 PHP 测试网页
Now we’ll browse to this page similar as before, except we’ll include the name of the file we just created in the URL.
现在,我们将像以前一样浏览到此页面,只是我们将在URL中包含刚刚创建的文件名。
Figure – Browsing to our PHP test page
图 – 浏览到我们的 PHP 测试页面
Next we will need to enable the headers module using the a2enmod command. This module will allow us to control headers from both incoming client requests and outgoing server responses.
接下来,我们需要使用 a2enmod 命令启用 headers 该模块。该模块将允许我们控制来自传入客户端请求和传出服务器响应的标头。
lab@support:~$ sudo a2enmod headersListing – Enabling the apache headers module
列表 – 启用 apache 标头模块
Finally, we will install the ModSecurity package. This module is an addon that acts as a web application firewall that will provide additional protection for our web server based on a set of configured rules. We will follow up on its configuration in the next section.
最后,我们将安装该 ModSecurity 软件包。该模块是一个插件,充当 Web 应用程序防火墙,它将根据一组配置的规则为我们的 Web 服务器提供额外的保护。我们将在下一节中跟进其配置。
lab@support:~$ sudo apt install libapache2-mod-security2Listing – Installing the libapache2-mod-security2 package
列表 – 安装 libapache2-mod-security2 软件包
We have finished installing all of our prerequisites for our web server. In the next section we will focus on hardening this install beyond the Apache defaults.
我们已经完成了 Web 服务器的所有先决条件的安装。在下一节中,我们将重点介绍如何在 Apache 默认值之外强化此安装。
Hardening Apache 强化阿帕奇
Out of the box, Apache is relatively locked down, but there are opportunities for improvement. The following steps will give you a general baseline that works well with this specific use case, however, you should always research additional ways to harden your system that works well for your specific use case.
开箱即用,Apache相对锁定,但也有改进的机会。以下步骤将为您提供适用于此特定用例的一般基线,但是,您应该始终研究其他方法来强化适合您的特定用例的系统。
To start things off we’ll clean out our web root /var/www/html of all the default and test files we created during our install.
首先,我们将清除我们在安装过程中创建的所有默认和测试文件的 Web 根目录 /var/www/html 。
lab@support:~$ sudo rm /var/www/html/*Listing – Purging our web root
列表 – 清除我们的网络根目录
Now we’ll browse back to our web page to make sure it reflects on this change.
现在,我们将浏览回我们的网页,以确保它反映此更改。
Figure – Browsing our web server with directory browsing enabled
图 – 在启用目录浏览的情况下浏览我们的 Web 服务器
In this case we see a directory listing of our web root, albeit it’s currently empty. This is expected behavior since we deleted the index.html file. This functionality will be addressed shortly.
在这种情况下,我们看到 Web 根目录的目录列表,尽管它当前为空。这是预期行为,因为我们删除了 index.html 该文件。此功能将很快得到解决。
One of the items that you have likely noticed is that our web page is also revealing sensitive information, specifically the version of Apache and OS details, which can be quite valuable to an attacker. Another way this information can be retrieved is through the use of the whatweb tool included on Kali Linux against our web server.
您可能已经注意到的其中一项是,我们的网页还泄露了敏感信息,特别是Apache和操作系统详细信息的版本,这对攻击者来说可能非常有价值。检索此信息的另一种方法是使用 Kali Linux 上包含的工具 whatweb 来对抗我们的 Web 服务器。
┌──(kali㉿kali)-[~]
└─$ whatweb http://192.168.0.7
http://192.168.0.7 [200 OK] Apache[2.4.52], Country[RESERVED][ZZ], HTTPServer[Ubuntu Linux][Apache/2.4.52 (Ubuntu)], IP[192.168.0.7], Index-Of, Title[Index of /]
Listing – Running the whatweb tool against our web server
列表 – 针对我们的网络服务器运行 whatweb 工具
In addition to this, if we were to browse a page that doesn’t exist, the server-generated pages would also include sensitive information.
除此之外,如果我们要浏览一个不存在的页面,服务器生成的页面也会包含敏感信息。
Figure – Details exposed with non-existent page
图 – 与不存在的页面一起显示的详细信息
We can mitigate these risks by modifying a couple of the Apache configuration files. The first one we will modify is the /etc/apache2/conf-available/security.conf file which will help limit the amount of data that is shared about the web service.
我们可以通过修改几个 Apache 配置文件来降低这些风险。我们将修改的第一个是文件, /etc/apache2/conf-available/security.conf 它将帮助限制有关 Web 服务的共享数据量。
We’ll modify this file by changing the value for the ServerTokens directive from ‘OS’ to ‘Prod’ using the sed command.
我们将通过使用 sed 命令将 ServerTokens 指令的值从“OS”更改为“Prod”来修改此文件。
lab@support:~$ sed -i 's/ServerTokens OS/ServerTokens Prod/' /etc/apache2/conf-available/security.confListing – Modifying the ServerTokens directive
列表 – 修改服务器令牌指令
Now we will limit the system information that is displayed on server-generated pages by changing the ServerSignature directive from On to Off within the same file.
现在,我们将通过将 ServerSignature 指令从 更改为 On 来 Off 限制服务器生成的页面上显示的系统信息。
lab@support:~$ sudo sed -i 's/ServerSignature On/ServerSignature Off/' /etc/apache2/conf-available/security.confListing – Modifying the ServerSignature directive
列表 – 修改服务器签名指令
Now we will disable the inclusion of frames to prevent clickjacking by removing the comment from the Header set X-Frame-Options: "sameorigin setting.
现在,我们将通过从 Header set X-Frame-Options: "sameorigin 设置中删除注释来禁用包含框架以防止点击劫持。
lab@support:~$ sudo sed -i 's/#Header set X-Frame-Options: "sameorigin"/Header set X-Frame-Options: "sameorigin"/' /etc/apache2/conf-available/security.confListing – Prevent clickjacking
列表 – 防止点击劫持
Next we will prevent MIME from interpreting files as something else than declared by the content type in the HTTP headers.
接下来,我们将防止 MIME 将文件解释为由 HTTP 标头中的内容类型声明的其他内容。
lab@support:~$ sudo sed -i 's/#Header set X-Content-Type-Options: "nosniff"/Header set X-Content-Type-Options: "nosniff"/' /etc/apache2/conf-available/security.confListing – Prevent MIME type manipulation
列表 – 防止 MIME 类型操作
Now let’s save our modified config file and restart the web service.
现在,让我们保存修改后的配置文件并重新启动 Web 服务。
lab@support:~$ sudo service apache2 restartListing – Restarting the apache2 service
列表 – 重新启动 apache2 服务
With the service back up and using our updated settings, we will rerun our whatweb command to verify that the discrete versioning info has been restricted.
备份服务并使用更新的设置后,我们将重新运行命令 whatweb 以验证离散版本控制信息是否已受到限制。
┌──(kali㉿kali)-[~]
└─$ whatweb http://192.168.0.7
http://192.168.0.7 [200 OK] Apache, Country[RESERVED][ZZ], HTTPServer[Apache], IP[192.168.0.7], Index-Of, Title[Index of /]
Listing – Running whatweb against our web server
列表 – 针对我们的网络服务器运行 whatweb
Perfect, this time we are not getting specific server information anymore. Although Apache is revealed, this isn’t much of a big deal as opposed to the exact version number.
完美,这次我们不再获得特定的服务器信息。虽然Apache被揭示了,但与确切的版本号相比,这没什么大不了的。
Next we will browse back to an invalid page to ensure server details are no longer being displayed.
接下来,我们将浏览回无效页面,以确保不再显示服务器详细信息。
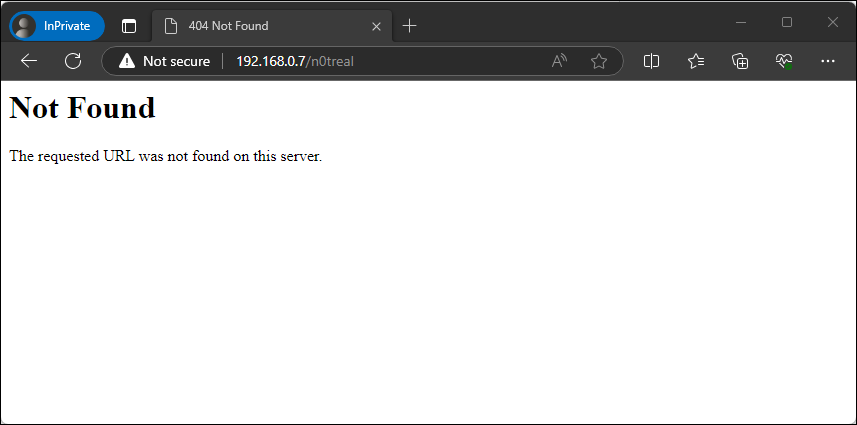
Figure – Details no longer exposed with non-existent page
图 – 详细信息不再显示在不存在的页面中
Now we will modify default accessibility options that are made available within the /etc/apache2/apache2.conf file, such as directory and file access controls and available HTTP methods. We will control these by modifying the <Directory> blocks within this file.
现在,我们将修改 /etc/apache2/apache2.conf 文件中可用的默认辅助功能选项,例如目录和文件访问控制以及可用的 HTTP 方法。我们将通过修改此文件中的 <Directory> 块来控制这些。
By default there are three directories named in this file, namely the file system root, user share and the web directory. Let’s take a look at the default settings so we can better understand what’s being allowed by default.
默认情况下,此文件中有三个目录,即文件系统根目录、用户共享目录和 Web 目录。让我们看一下默认设置,以便更好地了解默认允许的内容。
<Directory />
        Options FollowSymLinks
        AllowOverride None
        Require all denied
</Directory>

<Directory /usr/share>
        AllowOverride None
        Require all granted
</Directory>

<Directory /var/www/>
        Options Indexes FollowSymLinks
        AllowOverride None
        Require all granted
</Directory>
Listing – Default apache2.conf directory block settings
列表 – 默认 apache2.conf 目录块设置
The <Directory /> section applies to the entire file system and contains three rules.
该 <Directory /> 部分适用于整个文件系统,包含三个规则。
- Options FollowSymLinks 选项跟随符号链接
- AllowOverride None 允许覆盖无
- Require all denied 要求全部拒绝
The rule Options FollowSymLinks enables the ability for the web service to follow symbolic links. The rule AllowOverride None disables the processing of .htaccess files from that location. The rule Require all denied denied access to that directory for the web service account. Although access is denied, it still enables OPTIONS support for Symbolic links. While not necessarily critical for our use case, we’ll still explicitly deny it by changing it to Options None.
该规则 Options FollowSymLinks 使 Web 服务能够遵循符号链接。该规则 AllowOverride None 禁用从该位置处理 .htaccess 文件。该规则 Require all denied 拒绝 Web 服务帐户访问该目录。尽管访问被拒绝,但它仍启用 OPTIONS 对符号链接的支持。虽然不一定对我们的用例至关重要,但我们仍然会通过将其更改为 Options None .
<Directory />
        Options None
        AllowOverride None
        Require all denied
</Directory>
Listing – Blocking all options for the file system root
列表 – 阻止文件系统根目录的所有选项
The <Directory /usr/share> section applies to the user share directory and contains two rules.
该 <Directory /usr/share> 部分适用于用户共享目录,并包含两个规则。
- AllowOverride None 允许覆盖无
- Require all granted 要求全部授予
Like we saw below, this rule disables .htaccess processing but allows access to the /usr/share directory which by default is world-readable on a linux system.. This is useful when there are circumstances where there is data within /usr/share that you want to be made accessible to your web service. With this specific use case we do not need it so we’ll disable it by changing granted to denied. We will also include Options None.
就像我们在下面看到的,此规则禁用 .htaccess 处理,但允许访问默认情况下在 linux 系统上全局可读 /usr/share 的目录。当存在您希望 Web 服务可以访问 /usr/share 的数据时,这很有用。对于此特定用例,我们不需要它,因此我们将通过更改为 granted denied .我们还将包括 Options None .
<Directory /usr/share>
        Options None
        AllowOverride None
        Require all denied
</Directory>
Listing – Disabling access to /usr/share
列表 – 禁用对 /usr/share 的访问
The <Directory /var/www/> section applies to the document root for the web service which contains three rules.
该 <Directory /var/www/> 部分适用于包含三个规则的 Web 服务的文档根目录。
- Options Indexes FollowSymLinks
选项索引跟随符号链接 - AllowOverride None 允许覆盖无
- Require all granted 要求全部授予
This rule allows directory browsing as well as the ability to follow symbolic links, as directory with the inclusion of both Indexes and FollowSymLinks. In addition to what we have already seen, it does not enable .htaccess processing and grants access for the web service to that location. We are going to lock this down similarly to before by changing the options value to Options None.
此规则允许目录浏览以及跟踪符号链接的能力,作为包含 Indexes 和 FollowSymLinks 的目录。除了我们已经看到的内容之外,它不启用 .htaccess 处理并授予 Web 服务对该位置的访问权限。我们将像以前一样锁定它,将选项值更改为 Options None 。
<Directory /var/www/>
       Options None
       AllowOverride None
       Require all granted
</Directory>
Listing – Disabling directory browsing and symbolic links
列表 – 禁用目录浏览和符号链接
Now we’ll limit the availability of HTTP methods which are managed within the same blocks we just took a look at. First, we will verify what options are listed as available on our server by running nmap the http-methods script.
现在,我们将限制HTTP方法的可用性,这些方法在我们刚刚查看的相同块中进行管理。首先,我们将通过运行 nmap http-methods 脚本来验证服务器上列出的可用选项。
──(kali㉿kali)-[~]
└─$ nmap 192.168.0.7 -p 80 --script http-methods
Starting Nmap 7.94 ( https://nmap.org ) at 2023-08-22 12:11 EDT
Nmap scan report for 192.168.0.7
Host is up (0.00096s latency).
PORT   STATE SERVICE
80/tcp open  http
| http-methods:
|_  Supported Methods: GET POST OPTIONS HEAD

Nmap done: 1 IP address (1 host up) scanned in 0.27 seconds
Listing – Running the http-methods nse script
列表 – 运行 http-methods nse 脚本
In this case we can see that GET, POST, OPTIONS and HEAD are currently available. In order for us to lock this down, we will include the use of a LimitExcept clause to grant explicit access to named methods.
在本例中,我们可以看到 GET 、 POST OPTIONS 和 HEAD 当前可用。为了锁定它,我们将包括使用 LimitExcept 一个子句来授予对命名方法的显式访问。
<Directory /var/www/>
        <LimitExcept GET POST>
            Order deny,allow
            Deny from all
        </LimitExcept>
        Options None
        AllowOverride None
        Require all granted
</Directory>
Listing – Explicitly allowing GET and POST methods and blocking all others.
列表 – 显式允许 GET 和 POST 方法并阻止所有其他方法。
This logic explicitly allows the use of GET and POST and instructs the Apache2 to process the deny logic first, then denies all other methods. Due note that the HEAD method is allowed as it is inherited with the inclusion of GET.
此逻辑显式允许使用 GET and POST 并指示 Apache2 首先处理拒绝逻辑,然后拒绝所有其他方法。请注意,该方法是允许的,因为它是继承的, HEAD 包含 GET 。
The final settings we will address pertain to the lack of configured headers which can introduce browser-related vulnerabilities. While not necessarily critical for this use case since no legit users will be browsing to this web server, it is still useful to know.
我们将解决的最终设置与缺少配置的标头有关,这可能会引入与浏览器相关的漏洞。虽然对于此用例不一定至关重要,因为没有合法用户会浏览到此 Web 服务器,但了解它仍然很有用。
First we will need to enable the headers module we installed earlier using the a2enmod command then we’ll need to restart the web service.
首先,我们需要使用 a2enmod 命令启用我们之前安装的 headers 模块,然后我们需要重新启动 Web 服务。
lab@support:~$ sudo a2enmod headersListing > Enabling the apache headers module
清单 > 启用 apache 标头模块
Now we will disable the inclusion of frames to prevent clickjacking by removing the comment from the Header set X-Frame-Options: "sameorigin setting in /etc/apache2/conf-available/security.conf.
现在,我们将通过从 中的 Header set X-Frame-Options: "sameorigin /etc/apache2/conf-available/security.conf 设置中删除注释来禁用包含框架以防止点击劫持。
lab@support:~$ sudo sed -i 's/#Header set X-Frame-Options: "sameorigin"/Header set X-Frame-Options: "sameorigin"/' /etc/apache2/conf-available/security.confListing – Prevent clickjacking
列表 – 防止点击劫持
Next we will prevent MIME from interpreting files as something else than declared by the content type in the HTTP headers.
接下来,我们将防止 MIME 将文件解释为由 HTTP 标头中的内容类型声明的其他内容。
lab@support:~$ sudo sed -i 's/#Header set X-Content-Type-Options: "nosniff"/Header set X-Content-Type-Options: "nosniff"/' /etc/apache2/conf-available/security.confListing – Prevent MIME type manipulation
列表 – 防止 MIME 类型操作
Putting this all together our final configuration should look like this:
将所有这些放在一起,我们的最终配置应如下所示:
<Directory />
        Options None
        AllowOverride None
        Require all denied
</Directory>

<Directory /usr/share>
    Options None
      AllowOverride None
      Require all denied
</Directory>

<Directory /var/www/>
        <LimitExcept GET POST>
            Order deny,allow
            Deny from all
        </LimitExcept>
        Options None
        AllowOverride None
        Require all granted
</Directory>
…
Header always append X-Frame-Options DENY
Header always set X-Content-Type-Options nosniff
Listing – Final modified apache2.conf settings
列表 – 最终修改的 apache2.conf 设置
We are nearing the end of our hardening efforts and all that’s left for now is to complete the configuration of the ModSecurity module that we installed earlier. The default configuration file for this module is located at /etc/modsecurity/modsecurity.conf-recommended which we’ll need to rename for it to affect by removing -recommended from the end of the file name.
我们的强化工作即将结束,现在剩下的就是完成我们之前安装的 ModSecurity 模块的配置。此模块的默认配置文件位于 /etc/modsecurity/modsecurity.conf-recommended 该位置,我们需要重命名它,以便通过从文件名末尾删除 -recommended 来影响它。
We will simply make a copy of this so we will have a backup of the original file.
我们将简单地复制它,以便我们将备份原始文件。
lab@support:~$ sudo cp /etc/modsecurity/modsecurity.conf-recommended /etc/modsecurity/modsecurity.confListing – Creating a production copy of modsecurity.conf
列表 – 创建 modsecurity.conf 的生产副本
This system comes with a set of default rules that will provide decent protection security which includes rulesets from the OWASP project (https://owasp.org/www-project-modsecurity-core-rule-set/).
该系统带有一组默认规则,可提供良好的保护安全性,其中包括来自OWASP项目(https://owasp.org/www-project-modsecurity-core-rule-set/)的规则集。
We will be making a modification by adding an exclusion to give our lazy attackers a helping hand by disabling rule 913100. This rule contains logic to look for common keywords in the user agent field such as gobuster and hydra and will block responses to requests with those keywords in the agent field. Although seasoned penetration testers will spoof their user agent anyways we want to make sure don’t lose out on data from those who choose not to do so.
我们将通过添加排除项进行修改,以通过禁用规则 913100 为我们的懒惰攻击者提供帮助。此规则包含用于在用户代理字段中查找常见关键字(如 gobuster and hydra )的逻辑,并将阻止对代理字段中具有这些关键字的请求的响应。尽管经验丰富的渗透测试人员无论如何都会欺骗他们的用户代理,但我们希望确保不要丢失那些选择不这样做的人的数据。
We’ll append the /etc/modsecurity/crs/RESPONSE-999-EXCLUSION-RULES-AFTER-CRS.conf configuration file and add our exclusion by the detection id.
我们将追加配置文件, /etc/modsecurity/crs/RESPONSE-999-EXCLUSION-RULES-AFTER-CRS.conf 并按检测 ID 添加排除项。
lab@support:~$ echo -e "# Do not block requests from tools like hydra and gobuster\nSecRuleRemoveById 913100" | sudo tee /etc/modsecurity/crs/RESPONSE-999-EXCLUSION-RULES-AFTER-CRS.conf -aListing – Excluding rule id 913100 within modsecurity
列表 – 在 modsecurity 中排除规则 ID 913100
Now we will turn our attention to the default config file which only requires one step for us to take. The default configuration instructs the module to only detect threats and to not take any action against them.
现在我们将注意力转向默认配置文件,它只需要我们采取一个步骤。默认配置指示模块仅检测威胁,不对威胁采取任何措施。
This setting is controlled by the SecRuleEngine directive that is set to ‘DetectionOnly’. We will need to change this to ‘On’ it will detect and block traffic.
此设置由设置为“仅检测”的 SecRuleEngine 指令控制。我们需要将其更改为“开”,它将检测并阻止流量。
sudo sed -i 's/SecRuleEngine DetectionOnly/SecRuleEngine On/' /etc/modsecurity/modsecurity.confListing – Configuring ModSecurity to detect and block traffic
列表 – 配置 ModSecurity 以检测和阻止流量
With all of our changes made we’ll restart our web service and go back through our previous steps to ensure that our server has been locked down appropriately. We will start by simply attempting to browse to our page again.
完成所有更改后,我们将重新启动 Web 服务并返回前面的步骤,以确保我们的服务器已正确锁定。我们将首先尝试再次浏览到我们的页面。
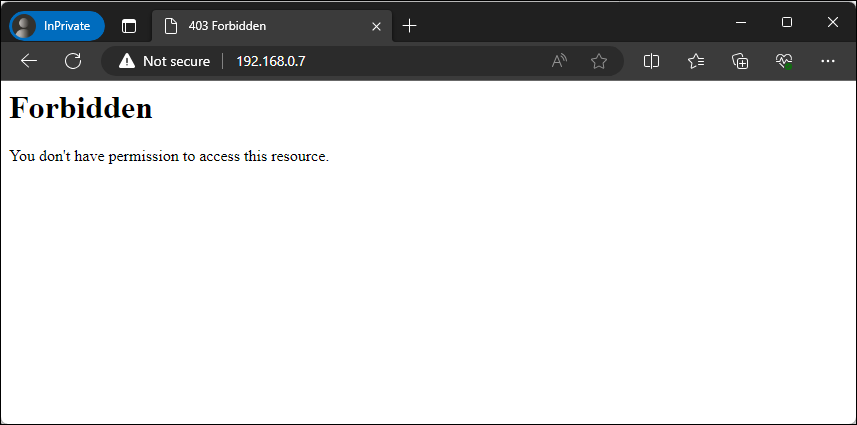
Figure – Browsing to our web server with forbidden access
图 – 浏览到禁止访问的网络服务器
We can now no longer view a directory listing of the web root. Now we’ll re-run our nmap command from before to ensure our HTTP methods are locked down.
现在,我们无法再查看 Web 根目录的目录列表。现在我们将重新运行之前的 nmap 命令,以确保我们的 HTTP 方法被锁定。
┌──(kali㉿kali)-[~]
└─$ nmap 192.168.0.7 -p 80 --script http-methods
Starting Nmap 7.94 ( https://nmap.org ) at 2023-08-22 12:14 EDT
Nmap scan report for 192.168.0.7
Host is up (0.0014s latency).
PORT   STATE SERVICE
80/tcp open  http

Nmap done: 1 IP address (1 host up) scanned in 0.22 seconds
Listing – Verifying that HTTP methods have been disabled
列表 – 验证是否已禁用 HTTP 方法
We do not see the supported methods that were shown earlier, which is good. Do note that if we were not using ModSecurity then this output would reveal POST as an available method. Now we’ll perform a sanity check by running a scan against our web server using the nikto tool on Kali Linux.
我们没有看到前面显示的支持方法,这很好。请注意,如果我们不使用 ModSecurity,那么此输出将显示 POST 作为可用方法。现在,我们将通过使用 Kali Linux 上的 nikto 工具对我们的 Web 服务器运行扫描来执行健全性检查。
┌──(kali㉿kali)-[~]
└─$ nikto -host http://192.168.0.7 -C all
- Nikto v2.5.0
---------------------------------------------------------------------------
+ Target IP:          192.168.0.7
+ Target Hostname:    192.168.0.7
+ Target Port:        80
+ Start Time:         2023-08-22 12:57:50 (GMT-4)
---------------------------------------------------------------------------
+ Server: Apache
+ 26640 requests: 0 error(s) and 0 item(s) reported on remote host
+ End Time:           2023-08-22 12:58:39 (GMT-4) (49 seconds)
---------------------------------------------------------------------------
+ 1 host(s) tested
Listing – Scanning our web server using Nikto
列表 – 使用 Nikto 扫描我们的网络服务器
This didn’t produce any output which tells us we have configured our header controls properly whereas those headers would’ve been the first two findings in most cases.
这不会产生任何输出,告诉我们我们已经正确配置了标头控件,而在大多数情况下,这些标头将是前两个发现。
Great work, at this point we have installed Apache and hardened the default configuration which has provided us with a solid foundation from which we can start building our honey tokens into the web server.
干得好,在这一点上,我们已经安装了Apache并强化了默认配置,这为我们提供了一个坚实的基础,我们可以从中开始将我们的蜂蜜令牌构建到Web服务器中。
Enumeration Honey Tokens
枚举蜂蜜令牌
The first honey token we will be planting on our web server will be used when attackers scan or enumerate the system for accessible files, directories and other useful information.
我们将在Web服务器上植入的第一个蜂蜜令牌将在攻击者扫描或枚举系统中以查找可访问的文件,目录和其他有用信息时使用。
While this is something we could use on any other production web server, those logs will become cluttered with traffic from both expected and unexpected sources, such as from driveby bots and other online scanning services. This makes it more difficult to differentiate between what’s critical or not without creeping on alert fatigue.
虽然我们可以在任何其他生产 Web 服务器上使用此功能,但这些日志将变得杂乱无章,其中包含来自预期和意外来源的流量,例如来自 driveby bot 和其他在线扫描服务的流量。这使得在不出现警觉疲劳的情况下区分什么是关键与否变得更加困难。
Since this is a honeypot, we already know that anyone browsing is not an actual user which immediately removes that unknown from the equation. This is hardly a smoking gun since bot traffic is a guarantee so we’ll need to introduce multiple levels for us to focus on to help cut down on some of the initial chatter that we may not initially care about.
由于这是一个蜜罐,我们已经知道任何浏览的人都不是实际用户,这会立即从等式中删除未知数。这几乎不是一个冒烟的枪,因为机器人流量是一个保证,所以我们需要引入多个级别供我们关注,以帮助减少一些我们最初可能不关心的初始喋喋不休。
We will stand up a simple landing page that will entice the curiosity of whomever is browsing the web server. Let’s take a look at the following HTML file we’ll be using as the index for our web root.
我们将建立一个简单的登录页面,该页面将吸引浏览Web服务器的人的好奇心。让我们看一下以下 HTML 文件,我们将用作 Web 根目录的索引。
<!DOCTYPE html>
<html lang="en">
<head>
    <meta charset="UTF-8">
    <meta name="viewport" content="width=device-width, initial-scale=1.0">
    <title>Website Under Development</title>
    <style>
        body {
            font-family: Arial, sans-serif;
            text-align: center;
            background-color: #f4f4f4;
            margin: 0;
            padding: 0;
        }
        .container {
            padding: 100px;
        }
        h1 {
            color: #333;
        }
        p {
            color: #777;
        }
    </style>
</head>
<body>
    <div class="container">
        <h1>Website Under Development</h1>
        <p>This support portal is our test instance and should not be used in production.</p>
        <p>Please report any issues you encounter with the engineering team at <a href="mailto:[email protected]">[email protected]</a>.</p>
    </div>
</body>
</html>
Listing – Content of our web root index.html file
列表 – 我们的 Web 根索引.html文件的内容
This page contains three components, a style sheet that will control the formatting and color of our page, the message that we want to display and an email address. We will save this file to /var/www/html/index.html and browse to it to see how it looks.
此页面包含三个组件,一个将控制页面格式和颜色的样式表,我们要显示的消息以及电子邮件地址。我们将此文件保存到 /var/www/html/index.html 并浏览到它以查看它的外观。

Figure – Browsing to our web root landing page
图 – 浏览到我们的网络根目录登录页面
While crude, most attackers are sensitized by the eye candy of ‘development’, ‘test’ and ‘portal’ buzzwords as an easy indicator that something interesting lies beyond this page.
虽然粗糙,但大多数攻击者对“开发”、“测试”和“门户”流行语的眼睛糖果很敏感,这很容易表明这个页面之外还有有趣的东西。
Another component we will take advantage of is planting an email address onto this page. If you have a workflow where you have the capability to centralize the process to analyze and respond to phishing emails then you can assume that every email sent to this mailbox is not legit and should be subject to analysis.
我们将利用的另一个组件是在此页面上植入一个电子邮件地址。如果您有一个工作流,在该工作流中,您可以集中分析和响应网络钓鱼电子邮件的过程,则可以假设发送到此邮箱的每封电子邮件都不合法,应该进行分析。
With our landing page setup, we now need to introduce a hidden directory that will only be discoverable through an entry we will add to a robots.txt file that will be placed in the web root. Although the ethical crawlers will honor the contents of this file, attackers will take advantage of this file looking to find a quick win.
通过我们的登录页面设置,我们现在需要引入一个隐藏目录,该目录只能通过添加到将放置在 Web 根目录中的 robots.txt 文件中的条目来发现。尽管道德爬虫会尊重此文件的内容,但攻击者会利用此文件寻求快速获胜。
To ensure that our new directory is only discoverable from this file we will use a simple script to check whether or not the directory path exists in any of the included Kali Linux wordlists. We will improve upon this by casting a wider net by installing the seclists package to add additional wordlists for us to sift through.
为了确保我们的新目录只能从这个文件中发现,我们将使用一个简单的脚本来检查目录路径是否存在于任何包含的 Kali Linux 单词列表中。我们将通过安装 seclists 软件包来添加额外的单词列表以供我们筛选,从而通过撒下更广泛的网络来改进这一点。
┌──(kali㉿kali)-[~]
└─$ sudo apt install seclists
Listing – Installing the seclists package
列表 – 安装秒列表包
With the seclists package now installed, we’ll save the following PowerShell script on our Desktop and call it isDiscoverable.ps1.
现在安装了seclists软件包,我们将在桌面上保存以下PowerShell脚本并调用它 isDiscoverable.ps1 。
$word = "devuseonly"
$wordlists = "/usr/share/wordlists"
$files = Get-ChildItem -Path $wordlists -Recurse -Include *.lst,*.txt
foreach ($file in $files) {
    if (Select-String -Path $file.FullName -Pattern $word -Quiet)
{
        Write-Host "$word is discoverable within $($file.FullName)"
        $found = $true
        break
    }
}
if (-not $found) {
    Write-Host "$word does not exist in the accessible wordlists"
}
Listing – Contents of the isDiscoverable powershell script
列表 – 是可发现的Powershell脚本的内容
This script contains a couple of components. We are storing the word we are looking for and the path to the wordlist directory in two variables. Then we are using the Get-ChildItem cmdlet to recursively grab all the lst and txt files that exist within the named path. Then we’re using a foreach loop to go through every file to search for the word we are looking for.
此脚本包含几个组件。我们将要查找的单词和单词列表目录的路径存储在两个变量中。然后, Get-ChildItem 我们使用 cmdlet 递归获取命名路径中存在的所有 lst 和 txt 文件。然后,我们使用循环 foreach 遍历每个文件以搜索我们要查找的单词。
If the word is found it will stop processing and output the file that contains our word. If it doesn’t, then it will output that it’s not currently accessible in those wordlists. At the time of writing this post, the word ‘devuseonly’ does not exist and the script took about 15 seconds to complete. Let’s go ahead and run this using pwsh.
如果找到单词,它将停止处理并输出包含我们单词的文件。如果没有,那么它将输出它当前在这些单词列表中无法访问。在撰写本文时,“devuseonly”一词不存在,脚本大约需要 15 秒才能完成。让我们继续使用 pwsh .
┌──(kali㉿kali)-[~]
└─$ pwsh Desktop/isDiscoverable.ps1
devuseonly does not exist in the accessible wordlists
Listing – Running our isDiscoverable.ps1 script
列表 – 运行我们的 isDiscoverable.ps1 脚本
With confidence that our designated word is unique, we will create our robots.txt file in our web root with a Disallow statement for the /devuseonly/ directory.
确信我们指定的单词是唯一的,我们将在我们的 Web 根目录中创建我们的 robots.txt 文件,其中包含 /devuseonly/ 目录的 Disallow 语句。
lab@support:~$ echo -e "User-agent: *\nDisallow: /devuseonly/" | sudo tee /var/www/html/robots.txtListing – Creating our robots.txt file
列表 – 创建我们的机器人.txt文件
Then we’ll create the aforementioned subdirectory and a basic landing page that will act as a placeholder as it’ll be replaced in the next section.
然后,我们将创建上述子目录和一个基本登录页面,该页面将充当占位符,因为它将在下一节中替换。
lab@support:~$ sudo mkdir /var/www/html/devuseonly/
lab@support:~$ echo -e "Working!" | sudo tee /var/www/html/devuseonly/index.html
Listing – Planting our secret web directory
上市 – 种植我们的秘密网络目录
Let’s run a quick test to make sure everything is accessible. First we will browse directly to the robots.txt file.
让我们运行一个快速测试,以确保所有内容都可以访问。首先,我们将直接浏览到机器人.txt文件。
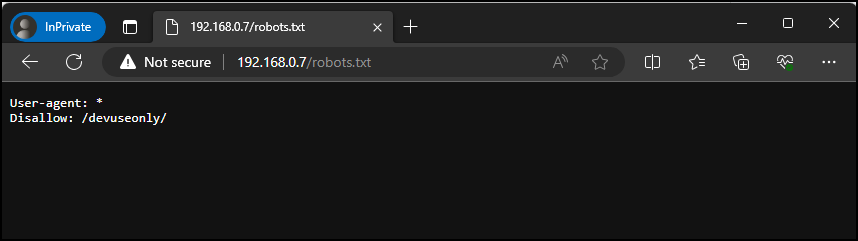
Figure – Browsing to our robots.txt file
图 – 浏览到我们的机器人.txt文件
Then we’ll browse directly to the devuseonly directory.
然后,我们将直接浏览到目录 devuseonly 。
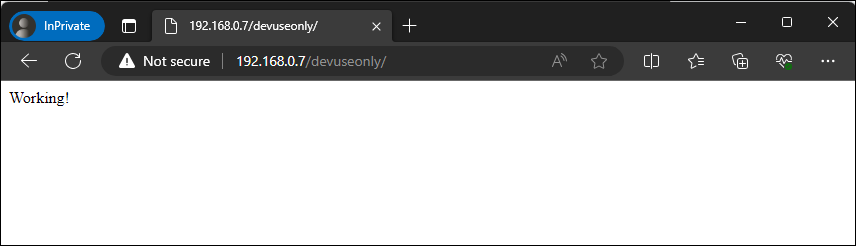
Figure – Browsing to our devuseonly directory
图 – 浏览到我们的 devuseonly 目录
Great, our hidden directory is working as expected. At this point we have successfully created a landing page designed to encourage an attacker to try harder and attempt to discover additional pages that may be accessible along with an email address for them to attempt to phish. We have also planted a hidden directory that is only accessible if an attacker disobeys the robots.txt directive.
太好了,我们的隐藏目录按预期工作。至此,我们已经成功创建了一个登录页面,旨在鼓励攻击者更加努力地尝试并尝试发现可以访问的其他页面以及他们尝试网络钓鱼的电子邮件地址。我们还植入了一个隐藏目录,只有在攻击者不服从机器人指令.txt才能访问该目录。
Authentication Honey Tokens
身份验证蜂蜜令牌
Now that we have an accessible hidden directory, we will now add the components needed for a logon portal. The lure for this stage that we are hoping for is that an attacker will think that we let our guard down by having a non-production portal with some form of authentication available from the internet and therefore would be more willing to attempt to use a variety of password attacks.
现在我们有一个可访问的隐藏目录,我们现在将添加登录门户所需的组件。我们希望这个阶段的诱惑是攻击者会认为我们通过拥有一个非生产门户来放松警惕,该门户可以从 Internet 获得某种形式的身份验证,因此更愿意尝试使用各种密码攻击。
We will be repurposing an attacker toolset for defensive purposes by implementing a credential harvester that will keep a log of every set of credentials that are sent through our logon form. Let’s take a look at what this page would look like when viewed from our browser.
我们将通过实施凭据收集器来重新利用攻击者工具集进行防御,该收集器将保留通过我们的登录表单发送的每组凭据的日志。让我们来看看从浏览器查看此页面时的外观。
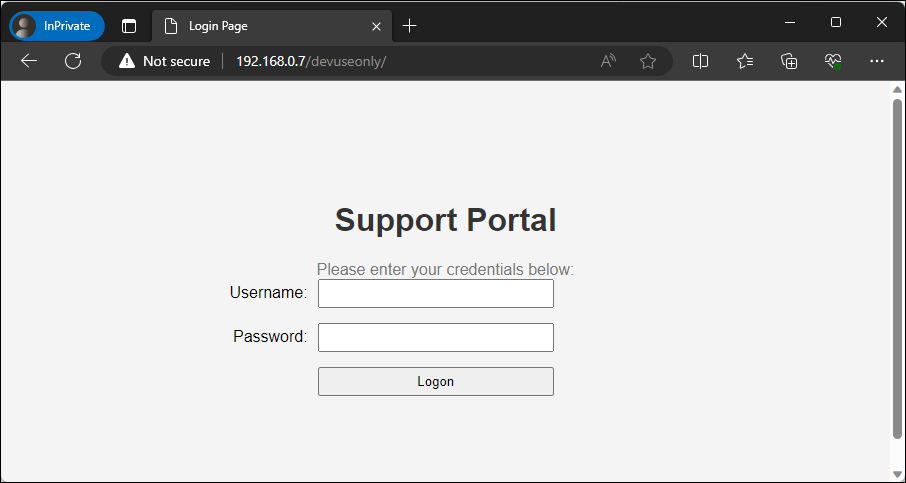
Figure – Viewing our support portal page
This presents us with a very basic login form. If we attempt to pass credentials through the form the page will process the request and after a few seconds will let us know that the credentials were incorrect.
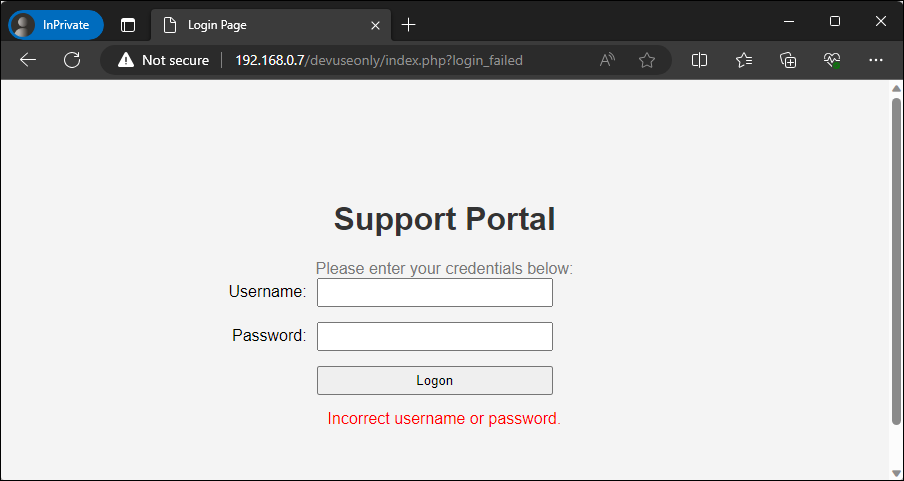
Figure – Viewing our support portal after invalid credentials
With a better understanding of the front-end experience, let’s take a look at the components of the code that form this functionality. First we are introducing another style sheet to ensure that there’s consistency by matching the existing color scheme and formatting between this page and the initial landing page.
<style>
        body {
            font-family: Arial, sans-serif;
            text-align: center;
            background-color: #f4f4f4;
            margin: 0;
            padding: 0;
        }
        .container {
            padding: 100px;
        }
        h1 {
            color: #333;
        }
        p {
            color: #777;
            margin: 0;
        }
        .login-form {
            margin-top: 20px;
        }
        .form-group {
            margin-bottom: 15px;
            display: flex;
            align-items: center;
            justify-content: center;
        }
        .form-group label {
            flex-basis: 30%;
            text-align: right;
            margin-right: 10px;
        }
        .form-group input,
        .form-group button {
            flex: 1;
            padding: 5px;
            max-width: 50%;
            box-sizing: border-box;
        }
        .form-label {
            flex-basis: 30%;
        }
        .form-controls {
            flex: 1;
            display: flex;
            justify-content: space-between;
            align-items: center;
        }
        .error-message {
            color: red;
            margin-top: 10px;
        }
    </style>
Listing – HTML style sheet for login form
列表 – 用于登录表单的 HTML 样式表
Then we are adding a simple HTML login form with fields for a username, password and a button as well as a form action to call post.php. The inclusion of this form action is critical as a savvy attacker will view the source code and if they don’t see any valid components that would make up a typical authentication process they will be wary of moving forward.
然后,我们将添加一个简单的HTML登录表单,其中包含用户名,密码和按钮的字段以及要调用 post.php 的表单操作。包含此表单操作至关重要,因为精明的攻击者将查看源代码,如果他们没有看到构成典型身份验证过程的任何有效组件,他们将对继续前进持谨慎态度。
<form class="login-form" action="post.php" method="post">
            <p>Please enter your credentials below:</p>
            <div class="form-group">
                <label class="form-label" for="username">Username:</label>
                <div class="form-controls">
                    <input type="text" id="username" name="username" required>
                </div>
            </div>

            <div class="form-group">
                <label class="form-label" for="password">Password:</label>
                <div class="form-controls">
                    <input type="password" id="password" name="password" required>
                </div>
            </div>

            <div class="form-group">
                <label class="form-label"></label>
                <div class="form-controls">
                    <button type="submit" name="login">Logon</button>
                </div>
            </div>
        </form>
Listing – HTML login form for our supportal portal
列表 – 我们支持门户的 HTML 登录表单
Now this is where we start getting sneaky with our inclusion of PHP. Our landing page will only contain the following snippet of PHP that will look to see if the url parameter `login_failed’ was included when the page was loaded and if so, display the text for incorrect credentials.
现在这就是我们开始偷偷加入PHP的地方。我们的登录页面将仅包含以下 PHP 代码段,该代码片段将查看加载页面时是否包含 url 参数“login_failed”,如果是,则显示不正确凭据的文本。
<?php
        if (isset($_GET['login_failed'])) {
            echo '<div class="error-message">Incorrect username or password.</div>';
        }
?>
Listing – PHP code to display incorrect username or password
列表 – PHP 代码显示不正确的用户名或密码
While that code is more so added here to keep our page appear more realistic, the devious activity occurs within our post.php page which is displayed in the listing below.
虽然此处添加了该代码以使我们的页面看起来更逼真,但狡猾的活动发生在我们的帖子.php页面中,该页面显示在下面的列表中。
<?php
// Sleep for two seconds to simulate validation
sleep(2);

// Capture client info
$ip = 'Remote IP: ' . $_SERVER['REMOTE_ADDR'];
if (isset($_SERVER['HTTP_X_FORWARDED_FOR']) && filter_var($_SERVER['HTTP_X_FORWARDED_FOR'], FILTER_VALIDATE_IP)) {
    $ip = 'Proxied IP: ' . $_SERVER['HTTP_X_FORWARDED_FOR'];
} elseif (isset($_SERVER['HTTP_CLIENT_IP']) && filter_var($_SERVER['HTTP_CLIENT_IP'], FILTER_VALIDATE_IP)) {
    $ip = 'Client IP: ' . $_SERVER['HTTP_CLIENT_IP'];
}

// Capture form data
$user_agent = substr($_SERVER['HTTP_USER_AGENT'], 0, 500);
$username = substr($_POST["username"] ?? '', 0, 100);
$password = substr($_POST["password"] ?? '', 0, 100);

// Check if both username and password are not empty
if (!empty($username) || !empty($password)) {
    // Prepare the log entry
    $timestamp = date('Y-m-d H:i:s');
    $entry = "$timestamp | Username: $username | Password: $password | $ip | Agent: $user_agent\r\n";

    // Append to the entry to the log file
    $file = '/var/www/logons.txt';
    file_put_contents($file, $entry, FILE_APPEND);
}

// Redirect the client back to the landing page
header("Location: http://192.168.0.7/devuseonly/index.php?login_failed");
exit;
?>
Listing – Contents of our post.php file
列表 – 我们的帖子.php文件的内容
The first action that will take place is the page will sleep for 2 seconds to simulate a web server attempting to validate credentials. Once that is complete, it will obtain and store the client ip address that is available within any of the named headers as well as a timestamp, username, password and append it to a log file. Although modsecurity will provide some protections against large form submissions we will add some server-side validation to limit how much data our post.php will save in our log file by grabbing the first 100 characters in the username and password field and the first 500 characters from the user agent field.
将发生的第一个操作是页面将休眠 2 秒钟,以模拟尝试验证凭据的 Web 服务器。完成后,它将获取并存储任何命名标头中可用的客户端 IP 地址以及时间戳、用户名、密码,并将其附加到日志文件中。尽管 modsecurity 将针对大型表单提交提供一些保护,但我们将添加一些服务器端验证,以限制我们的帖子.php通过获取用户名和密码字段中的前 100 个字符以及用户代理字段中的前 500 个字符来保存在日志文件中的数据量。
It is important to make sure that this file is not accessible from the web server so you do not burn the contents of this file which will raise immediate suspicion. By default the document root is /var/www/html.
重要的是要确保无法从Web服务器访问此文件,以免刻录此文件的内容,这将立即引起怀疑。默认情况下,文档根目录为 /var/www/html 。
For now we will create the log at /var/www/logons.txt and apply the necessary permissions for the www-data account.
现在,我们将在以下位置 /var/www/logons.txt 创建日志并为 www-data 该帐户应用必要的权限。
sudo touch /var/www/logons.txt
sudo chown www-data:www-data /var/www/logons.txt
sudo chmod 644 /var/www/logons.txt
Listing – Creating our log file for authentication attempts
列表 – 为身份验证尝试创建日志文件
Now that we know how everything works, we’ll save the listing for our post.php file to /var/www/html/devuseonly/post.php. Then we will save the contents of the listing below to /var/www/html/devuseonly/index.php and restart our web service.
现在我们知道了一切是如何工作的,我们将 post.php 文件的列表保存到 /var/www/html/devuseonly/post.php 。然后,我们将以下列表的内容保存到 /var/www/html/devuseonly/index.php 并重新启动我们的 Web 服务。
<!DOCTYPE html>
<html lang="en">
<head>
    <meta charset="UTF-8">
    <meta name="viewport" content="width=device-width, initial-scale=1.0">
    <title>Login Page</title>
    <style>
        body {
            font-family: Arial, sans-serif;
            text-align: center;
            background-color: #f4f4f4;
            margin: 0;
            padding: 0;
        }
        .container {
            padding: 100px;
        }
        h1 {
            color: #333;
        }
        p {
            color: #777;
            margin: 0;
        }
        .login-form {
            margin-top: 20px;
        }
        .form-group {
            margin-bottom: 15px;
            display: flex;
            align-items: center;
            justify-content: center;
        }
        .form-group label {
            flex-basis: 30%;
            text-align: right;
            margin-right: 10px;
        }
        .form-group input,
        .form-group button {
            flex: 1;
            padding: 5px;
            max-width: 50%;
            box-sizing: border-box;
        }
        .form-label {
            flex-basis: 30%;
        }
        .form-controls {
            flex: 1;
            display: flex;
            justify-content: space-between;
            align-items: center;
        }
        .error-message {
            color: red;
            margin-top: 10px;
        }
    </style>
</head>
<body>
    <div class="container">
        <h1>Support Portal</h1>
        <form class="login-form" action=post.php method="post">
            <p>Please enter your credentials below:</p>
            <div class="form-group">
                <label class="form-label" for="username">Username:</label>
                <div class="form-controls">
                    <input type="text" id="username" name="username" required>
                </div>
            </div>

            <div class="form-group">
                <label class="form-label" for="password">Password:</label>
                <div class="form-controls">
                    <input type="password" id="password" name="password" required>
                </div>
            </div>

            <div class="form-group">
                <label class="form-label"></label>
                <div class="form-controls">
                    <button type="submit" name="login">Logon</button>
                </div>
            </div>
        </form>
        <?php
        if (isset($_GET['login_failed'])) {
            echo '<div class="error-message">Incorrect username or password.</div>';
        }
        ?>
    </div>
</body>
</html>
Listing – Our complete index.php file
列表 – 我们的完整索引.php文件
With everything in place, let’s go ahead and attempt a login and make sure that everything is working and that our logon attempt has been logged.
一切就绪后,让我们继续尝试登录,并确保一切正常,并且我们的登录尝试已被记录。
lab@support:~$ cat /var/www/logons.txt
Username: blueteamers | Password: havemorefun | Remote IP: 2023-08-23 12:19:27 | 192.168.0.4 | Agent: Mozilla/5.0 (Windows NT 10.0; Win64; x64) AppleWebKit/537.36 (KHTML, like Gecko) Chrome/116.0.0.0 Safari/537.36 Edg/116.0.1938.54
Listing – Verifying our test logon was logged
列表 – 验证我们的测试登录是否已记录
Fantastic, our login portal is working as expected and we can collect credentials that are sent through the form.
太棒了,我们的登录门户按预期工作,我们可以收集通过表单发送的凭据。
Collecting Honey 收集蜂蜜
With our honeypot build complete, now we will see how we can take advantage of this system. Throughout this narrative we will assume the role of an attacker and defender. Before we get started, let’s go ahead and purge our log files so we’ll work with a clean state.
随着我们的蜜罐构建完成,现在我们将看到如何利用这个系统。在整个叙述过程中,我们将扮演攻击者和防御者的角色。在开始之前,让我们继续清除日志文件,以便使用干净状态。
lab@support:~$ sudo truncate /var/log/apache2/access.log -s 0
lab@support:~$ sudo truncate /var/log/apache2/error.log -s 0
lab@support:~$ sudo truncate /var/www/logons.txt -s 0
Listing – Purging the log files
列表 – 清除日志文件
At some point, an attacker will typically browse to the page to obtain their bearings once a nmap scan or similar tool identifies this system as being accessible.
在某些时候,一旦 nmap 扫描或类似工具确定此系统可访问,攻击者通常会浏览到该页面以获取其方位。
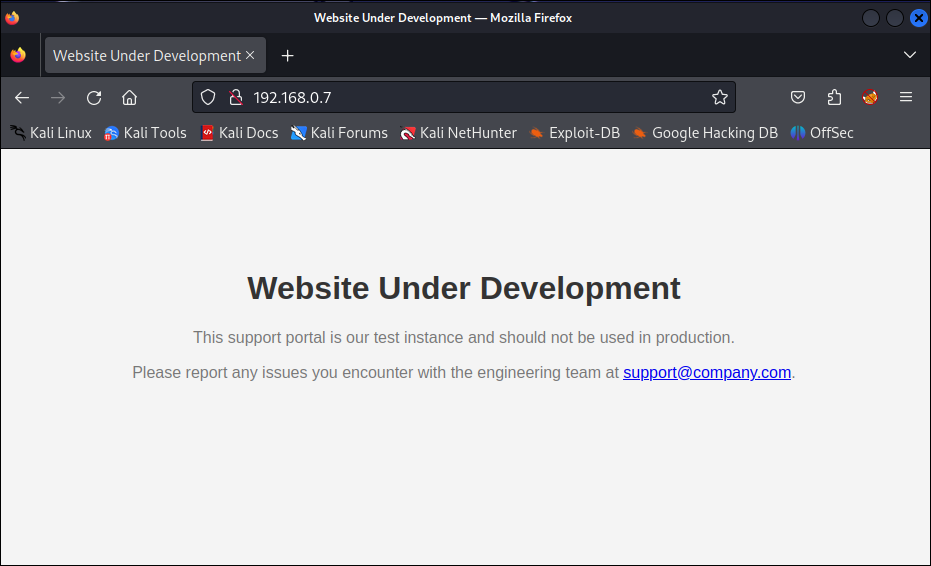
Figure – Attacker viewing the landing page
图 – 攻击者查看登陆页面
From an attacker viewpoint we have immediately learned two things:
从攻击者的角度来看,我们立即学到了两件事:
-
There is a test/development system available through a DMZ which was likely not intended and may have fewer controls than a production system
有一个通过DMZ提供的测试/开发系统,它可能不是故意的,并且可能比生产系统具有更少的控制 -
An email address has been exposed that I could attempt to send phishing emails to
暴露了一个电子邮件地址,我可以尝试将网络钓鱼电子邮件发送到
From the defender viewpoint I can identify that someone has browsed our honeypot system by viewing the /var/www/log/apache2/access.log file. This will be extremely common and does not warrant an immediate response, but at a minimum you have collected an ip address that you know is not from any sort of legitimate use.
从防御者的角度来看,我可以通过查看 /var/www/log/apache2/access.log 文件来识别有人浏览了我们的蜜罐系统。这将是非常普遍的,并且不保证立即响应,但至少您已经收集了一个您知道不是来自任何形式的合法用途的 IP 地址。
lab@support:~$ tail -f /var/log/apache2/access.log
192.168.0.4 - - [23/Aug/2023:18:32:14 +0000] "GET / HTTP/1.1" 200 844 "-" "Mozilla/5.0 (Windows NT 10.0; Win64; x64) AppleWebKit/537.36 (KHTML, like Gecko) Chrome/116.0.0.0 Safari/537.36 Edg/116.0.1938.54"
Listing – Identifying initial access to the web server
列表 – 识别对 Web 服务器的初始访问
While we know that we have no concerns with the inclusion of that email address on this web page we can assume that at some point someone will send an email to it. Now at some point the attacker is going to learn that there is nothing else usable from this landing page and will attempt to identify other accessible pages by using a tool such as gobuster. We will run this against the web page to see if we identify any other available resources using a simple wordlist.
虽然我们知道我们不担心在此网页上包含该电子邮件地址,但我们可以假设在某个时候有人会向其发送电子邮件。现在,攻击者将在某些时候了解到此登录页面中没有其他可用内容,并将尝试使用诸如 gobuster .我们将针对网页运行它,以查看我们是否使用简单的单词列表识别任何其他可用资源。
┌──(kali㉿kali)-[~]
└─$ gobuster dir -e -u http://192.168.0.7/ -w /usr/share/wordlists/dirb/common.txt
===============================================================
Gobuster v3.5
by OJ Reeves (@TheColonial) & Christian Mehlmauer (@firefart)
===============================================================
[+] Url:                     http://192.168.0.7/
[+] Method:                  GET
[+] Threads:                 10
[+] Wordlist:                /usr/share/wordlists/dirb/common.txt
[+] Negative Status codes:   404
[+] User Agent:              gobuster/3.5
[+] Expanded:                true
[+] Timeout:                 10s
===============================================================
2023/08/23 14:32:57 Starting gobuster in directory enumeration mode
===============================================================
http://192.168.0.7/.bash_history        (Status: 403) [Size: 199]
http://192.168.0.7/.hta                 (Status: 403) [Size: 199]
http://192.168.0.7/.config              (Status: 403) [Size: 199]
http://192.168.0.7/.bashrc              (Status: 403) [Size: 199]
http://192.168.0.7/.htaccess            (Status: 403) [Size: 199]
http://192.168.0.7/.git/HEAD            (Status: 403) [Size: 199]
http://192.168.0.7/.mysql_history       (Status: 403) [Size: 199]
http://192.168.0.7/.htpasswd            (Status: 403) [Size: 199]
http://192.168.0.7/.profile             (Status: 403) [Size: 199]
http://192.168.0.7/.sh_history          (Status: 403) [Size: 199]
http://192.168.0.7/.svn/entries         (Status: 403) [Size: 199]
http://192.168.0.7/_vti_bin/_vti_aut/author.dll (Status: 403) [Size: 199]
http://192.168.0.7/_vti_bin/_vti_adm/admin.dll (Status: 403) [Size: 199]
http://192.168.0.7/_vti_bin/shtml.dll   (Status: 403) [Size: 199]
http://192.168.0.7/akeeba.backend.log   (Status: 403) [Size: 199]
http://192.168.0.7/awstats.conf         (Status: 403) [Size: 199]
http://192.168.0.7/development.log      (Status: 403) [Size: 199]
http://192.168.0.7/global.asax          (Status: 403) [Size: 199]
http://192.168.0.7/global.asa           (Status: 403) [Size: 199]
http://192.168.0.7/index.html           (Status: 200) [Size: 905]
http://192.168.0.7/main.mdb             (Status: 403) [Size: 199]
http://192.168.0.7/php.ini              (Status: 403) [Size: 199]
http://192.168.0.7/production.log       (Status: 403) [Size: 199]
http://192.168.0.7/robots.txt           (Status: 200) [Size: 37]
http://192.168.0.7/server-status        (Status: 403) [Size: 199]
http://192.168.0.7/spamlog.log          (Status: 403) [Size: 199]
http://192.168.0.7/thumbs.db            (Status: 403) [Size: 199]
http://192.168.0.7/Thumbs.db            (Status: 403) [Size: 199]
http://192.168.0.7/web.config           (Status: 403) [Size: 199]
http://192.168.0.7/WS_FTP.LOG           (Status: 403) [Size: 199]
Listing – Running gobuster against our web server
列表 – 针对我们的网络服务器运行 gobuster
The scan completed and it revealed the availability of both http://192.168.0.7/robots.txt and http://192.168.0.7/index.html. Depending on the wordlists used and the number of attackers interacting with the system our access.log will start to get very large very quickly. The wordlist we used previously contains over 4000 entries so expect at a minimum 4000 lines of access attempts.
扫描完成,它揭示了 http://192.168.0.7/robots.txt 和 http://192.168.0.7/index.html 的可用性。根据所使用的单词列表以及与系统交互的攻击者的数量.log我们的访问权限将很快开始变得非常大。我们之前使用的单词列表包含 4000 多个条目,因此预计至少有 4000 行访问尝试。
lab@support:~$ tail -f /var/log/apache2/access.log
192.168.0.4 - - [23/Aug/2023:18:32:14 +0000] "GET / HTTP/1.1" 200 844 "-" "Mozilla/5.0 (Windows NT 10.0; Win64; x64) AppleWebKit/537.36 (KHTML, like Gecko) Chrome/116.0.0.0 Safari/537.36 Edg/116.0.1938.54"
192.168.0.6 - - [23/Aug/2023:18:32:57 +0000] "GET / HTTP/1.1" 200 788 "-" "gobuster/3.5"
192.168.0.6 - - [23/Aug/2023:18:32:57 +0000] "GET /88fc33f4-ac7e-4e9c-b1cd-b644b36e33bc HTTP/1.1" 404 397 "-" "gobuster/3.5"
Listing – Identifying directory scanning against our web server
列表 – 识别针对我们的 Web 服务器的目录扫描
This is nothing to be surprised of at this stage, but we can still leverage the data that has been made accessible to us. For example, we can generate a list of every ip that has accessed our web server but has not accessed our hidden page using a combination of grep, awk and sort.
在现阶段,这并不奇怪,但我们仍然可以利用已提供给我们的数据。例如,我们可以使用 , awk 和 sort 的组合 grep 生成每个访问过我们的 Web 服务器但尚未访问我们的隐藏页面的 ip 的列表。
lab@support:~$ grep -v '/devuseonly/' "/var/log/apache2/access.log" | awk '{print $1}' | sort -u
192.168.0.4
192.168.0.6
192.168.0.7
192.168.0.13
Listing – Identifying ip addresses that have scanned our system
列表 – 识别已扫描我们系统的 IP 地址
At this point we need to decide if we want to take any sort of action against these addresses, such as reporting them to an ip abuse database, block them all together or allow them to continue. For now we will perform a similar search to make sure no one has attempted to access our portal yet.
此时,我们需要决定是否要对这些地址采取任何行动,例如将它们报告给IP滥用数据库,将它们全部阻止或允许它们继续。现在,我们将执行类似的搜索,以确保还没有人尝试访问我们的门户。
lab@support:~$ grep '/devuseonly/' "/var/log/apache2/access.log" | awk '{print $1}' | sort -uListing – Identifying no ip addresses that have accessed devuseonly
列表 – 未识别访问过 devuseonly 的 IP 地址
This didn’t return any results so we know we don’t have an aggressive attacker yet but we can still take advantage of the data we have available by building our own wordlist of directories attackers are trying.
这没有返回任何结果,所以我们知道我们还没有一个激进的攻击者,但我们仍然可以通过构建我们自己的攻击者正在尝试的目录词列表来利用我们可用的数据。
lab@support:~$ awk '{split($7, path, /\//); for (i=2; i<=length(path); i++) { if (path[i] != "") print path[i] }}' /var/log/apache2/access.log | sort -uListing – Building a directory wordlist using awk
列表 – 使用 awk 构建目录词列表
Now we will return to the attacker perspective. The only piece of information that was really useful from that scan was the availability of the robots.txt file which we’ll access using a curl command.
现在我们将回到攻击者的角度。扫描中唯一真正有用的信息是机器人.txt文件的可用性,我们将使用 curl 命令访问该文件。
──(kali㉿kali)-[~]
└─$ curl http://192.168.0.7/robots.txt
User-agent: *
Disallow: /devuseonly/
Listing – Accessing robots.txt using curl
列表 – 使用 curl 访问机器人.txt
As we mentioned before, the ethical crawlers will ignore everything that is mentioned in this file, but since we are an attacker, we’ll use this file to our advantage and attempt to browse to that path to discover new content.
正如我们之前提到的,道德爬虫将忽略此文件中提到的所有内容,但由于我们是攻击者,我们将利用此文件的优势并尝试浏览到该路径以发现新内容。

Figure – Attacker viewing the login portal
图 – 查看登录门户的攻击者
At this point the attacker is probably very happy to see that they have discovered the availability of a logon page. While steps that will be taken here will depend on many factors and experience levels, let us assume that the attacker decides to launch a password attack against this form in an attempt to discover valid credentials.
此时,攻击者可能很高兴看到他们发现了登录页面的可用性。虽然此处将采取的步骤将取决于许多因素和经验水平,但让我们假设攻击者决定对此表单发起密码攻击,以尝试发现有效的凭据。
──(kali㉿kali)-[~]
└─$ hydra -l admin -P /usr/share/seclists/Passwords/Default-Credentials/default-passwords.txt 192.168.0.7 http-post-form "/devuseonly/post.php:username=^USER^&password=^PASS^&login=":Incorrect
Listing – Attacking attempt to discover valid credentials with hydra
列表 – 攻击尝试使用 hydra 发现有效凭据
From the attacker perspective, everything will ultimately fail and they will either keep trying or give up. However, from the defender point of view, we have a lot of new data at our disposal now that we can take advantage of. To start, we’ll run another check to see if anyone has accessed our hidden directory.
从攻击者的角度来看,一切最终都会失败,他们要么继续尝试,要么放弃。但是,从防御者的角度来看,我们现在可以使用大量新数据。首先,我们将运行另一个检查,看看是否有人访问了我们的隐藏目录。
lab@support:~$ grep '/devuseonly/' "/var/log/apache2/access.log" | awk '{print $1}' | sort -u
192.168.0.6
Listing – Identifying an ip address that has accessed devuseonly
列表 – 标识已访问 devuseonly 的 IP 地址
In this case someone has stepped into the next level of our honeypot which will warrant more attention on our end. We already know that the only thing that is accessible on this page is a fake login page so we’ll look to see if any credentials have been stored.
在这种情况下,有人已经进入了我们蜜罐的下一个层次,这将值得我们更多关注。我们已经知道,此页面上唯一可以访问的是虚假登录页面,因此我们将查看是否已存储任何凭据。
lab@support:~$ tail -f /var/www/logons.txt
2023-08-23 16:19:27 | Username: admin | Password: RIP000 | Remote IP: 192.168.0.6 | Agent: Mozilla/5.0 (Hydra)
2023-08-23 16:19:29 | Username: admin | Password: 1234admin | Remote IP: 192.168.0.6 | Agent: Mozilla/5.0 (Hydra)
2023-08-23 16:19:31 | Username: [email protected] | Password: GrillinNHackin1337 | Remote IP: 192.168.0.6 | Agent: Mozilla/5.0 (Hydra)
Listing – Contents of the logon.txt file with credentials
列表 – 具有凭据的登录.txt文件的内容
In this case we can see that the attacker has indeed launched a password attack against our portal which has provided us with the knowledge of the usernames and passwords that they are trying. When you are made aware of credentials being logged, you have immediately learned that an attacker is aggressively trying to validate credentials but more importantly is the last entry in the list which appears to be more a more formalized username for [email protected] and the password GrillinNHackin1337.
在这种情况下,我们可以看到攻击者确实对我们的门户发起了密码攻击,这为我们提供了他们正在尝试的用户名和密码的知识。当您意识到正在记录凭据时,您会立即了解到攻击者正在积极尝试验证凭据,但更重要的是列表中的最后一个条目,它似乎更正式 [email protected] 地是用户名和密码 GrillinNHackin1337 。
As a defender we need to actively monitor for changes to this log file to see if any of them appear to be legitimate which could lead to the assumption that Tristram has been phished or otherwise compromised their credentials. At which point the alarms should be raised and incident response procedures should be engaged. In addition to this, we can use the other entries to generate custom wordlists for usernames and passwords that are being used by attackers.
作为防御者,我们需要主动监控此日志文件的更改,以查看其中是否有任何更改似乎是合法的,这可能导致假设 Tristram 已被网络钓鱼或以其他方式破坏其凭据。此时应发出警报并启动事件响应程序。除此之外,我们还可以使用其他条目为攻击者正在使用的用户名和密码生成自定义单词列表。
Let’s summarize everything we have learned from this scenario:
让我们总结一下我们从这个场景中学到的一切:
Attacker Perspective 攻击者视角
- A development/test system has been made accessible to the internet that contains an email address on the landing page
互联网上有一个开发/测试系统,该系统在登录页面上包含一个电子邮件地址 - A logon portal is accessible from a path disclosed through the use of a robots.txt file
登录门户可通过使用机器人.txt文件披露的路径访问 - We were unable to verify any combination of usernames and passwords that we tried
我们无法验证我们尝试过的用户名和密码的任何组合
Defender Insight 后卫洞察
- Gained the ability to publish a mailbox that is expected to receive spam and phishing emails that can be assessed and merit a response prior to legit mailboxes receiving messages from the same sender
获得了发布邮箱的能力,该邮箱预计将接收垃圾邮件和网络钓鱼电子邮件,这些邮箱可以在合法邮箱接收来自同一发件人的邮件之前进行评估并值得响应 - Gained the ability to derive a list of directories that attackers are actively using in their wordlists to discover directories on a web server
能够派生攻击者在其单词列表中主动使用的目录列表,以发现 Web 服务器上的目录 - Gained the ability to derive a list of malicious ip addresses from variable levels of aggressive scanning
能够从不同级别的主动扫描中获取恶意 IP 地址列表 - Gained the ability to derive a list of usernames and passwords that are actively being tried by an attacker that can be used to build your own wordlist of known credentials being used in the while as well as those that may be legitimate credentials from an employee implying they have been compromised
能够派生攻击者正在积极尝试的用户名和密码列表,这些用户名和密码可用于构建您自己的已知凭据的单词列表,以及那些可能是员工的合法凭据,暗示他们已被泄露
There is a wealth of information that can be made accessible through a well placed and designed web server honeypot. With due care, you could expand upon this use case even further by planting valid credentials that would then reveal functionality to upload files that are saved to the system in a secure manner that are then immediately shipped to VirusTotal.
可以通过放置良好且设计良好的Web服务器蜜罐访问大量信息。如果谨慎,您可以通过植入有效的凭据来进一步扩展此用例,然后显示以安全方式上传到系统的文件的功能,然后立即发送到 VirusTotal。
Wrapping Up 总结
In this topic we have enhanced our understanding of honeypots and how we could build one to assist in our awareness and response to cyber security attacks. The opportunities that you can deploy are endless and if we continue to work together and share ideas we will make our industries a safer place.
在本主题中,我们增强了对蜜罐的理解,以及如何构建蜜罐以帮助我们意识到和响应网络安全攻击。您可以部署的机会是无穷无尽的,如果我们继续合作并分享想法,我们将使我们的行业成为一个更安全的地方。
相关文章
暂无评论...